
Native Instruments’ FM8 is monster of a synthesiser capable of a vastly broad palette of sounds ranging from brutal Skrillex transformer-type bass to searing pads and leads to late 80s/early 90s rave sounds and beyond. One thing I think it really excels at too, is expressive ambient pads, and that’s what we’re going to have a look at today.
FM8 is based on Yamaha’s DX7, which was released in 1983. Polarising the music production market and arguably changing synthesisers forever, the DX7’s architectures was based on frequency modulation (more on this later) and could create incredibly complex sounds with ease. Renowned as being a sod to program though, many users were confined to its trite classic sounding presets.

Here’s what the FM8 manual has to say about the DX7:
Boasting aftertouch, velocity sensitivity, a new type of synthesis that was very different from analogue subtractive synthesizers, a new protocol called “MIDI,” and a shockingly low list price, the DX7 was an instant hit and went on to become the best-selling synthesizer of its time.
Ambient overlords Brian Eno and Ulrich Schnuass famously used the DX7 as workhorses in their music, the former on many of his eighties albums. Here’s an extract from a 1987 issue of Keyboard Magazine where Eno himself details four of his DX7 patches:

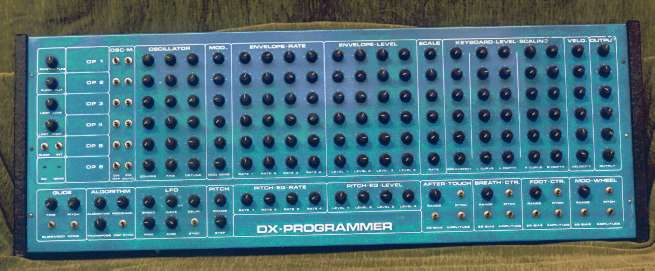
Ulrich owns one of the few external DX7 programmers, giving a slightly more sympathetic view to the complex matrix and cross modulation capabilities of the beast.
Luckily FM8 is far easier to manoeuvre. Yes, it’s not a walk in the park to program compared to standard subtractive synthesisers, but it’s capable of producing the same detailed timbre sounds as its forefathers, and going further in the process. So without further ado, let’s start with some background…
Frequency Modulation
The term FM is probably (or at least until not that long ago) a household term which you would have come across through radio (see also AM, or Amplitude Modulation). It’s been around for years to transmit radio signals. As a concept, I struggled with it for years until I had a eureka moment – I was unsure how it different from standard pitch modulation. Let’s first think about and LFO.
LFO stands for Low Frequency Oscillator, and would ordinarily function between about 0.01 Hz and 20 Hz. This range is sub-sonic, sub meaning below and sonic meaning audible. So LFOs are below the human hearing range – if we plugged one into a speaker you might feel some change in air pressure or hear a click, but as an oscillator it’s inaudible. These make them useful for changing other parameters such as filter cutoff or amplitude, or in the case of vibrato: pitch.
Vibrato is a technique employed by singers and many instrumentalists (including guitarists, violinists, trumpet players etc) that slowly fluctuates the pitch of a resting note. The great blues and soul singers such as Ella Fitzgerald were masters at this, a gentle undulating swell of vibrato on certain notes makes phrases sound beautiful.
In a synth this is easy to achieve, we just use an LFO to slightly modulate an oscillator’s pitch. What’s happening, is the pitch (an audible frequency) is being modulated by an LFO (an inaudible frequency). So what happens if we modulate the pitch by another pitch? This is what frequency modulation is – we no longer hear the original pitch being shifted slightly, but we hear a complex set of tones and harmonics, useful for creating bells, weird pads, punchy basses and a whole plethora of sounds.
Today I want to focus on just pad creation, making something that deceptively complex sounding, yet still ethereal and angelic. Here’s what we’re working towards:
Getting Started
I’m going to try and explain as much as I can about FM8 without derailing this tutorial too much in to a “this is exactly how every feature on FM8 works” article, but I’ll explain enough about it as I go along so you should be able to follow regardless of your prior experience with this synth.
Let’s start in the Expert section, which can be found on the left Navigator menu. Within here we can access each of our six Operators plus the filter and distortion sections, we can view an overview of the operators and envelopes plus some modulation and a neat spectral analyser (note the x-axis in this analyser is linear and not logarithmic like most others).

Rather than setting each operator’s Ratio, Offset and Waveform before hearing anything (like some other tutorials), we’re going to be building this sound bit by bit. The default patch has Operator F routed to our master with an amplitude of 80, panned dead centre. Let’s enable Operator E by ctrl + clicking on it. In the slot to the left of where it says 80, click and drag up until it also says 80. Now we’re sending Operator E to our master by 80 also.
Now let’s adjust their Offset marginally – which is like detune in an ordinary subtractive synth. I’ve gone for 0.42 and -0.32 but you can use what works for you. The wider they’re tuned apart the more they’ll buzz and beat against each other, the narrower the less the detuned effect will be heard.
Next let’s pan E and F hard left and right respectively. The pan is just below their output volume, drag down to pan left and up to pan right. So far we have two slightly detuned sine waves panned left and right, nothing special.

One of FM8’s most powerful features is the flexible envelopes, which can have loopable sustain stages, linear, exponential and logarithmic curves as well as being synced to a host tempo. We’ll deal properly with each Operator’s individual envelopes later but now we’re going to add release to all of them at once. This means we can have them all fade out at the same time.
In the Env section of our Expert panel, click each Operator A to F and click Tempo Sync in the top right of that window. Once you’re done click the Link toggle – this means anything we do to one envelope will be done to them all. I’ve dragged the Release stage out to 5/4 (five quarter beats) and adjusted the curvature slightly.

Once you’ve adjusted the release times ensure you unlink the envelopes before moving on to the next stages.
The rest of the sound is going to be worked on in pairs of Operators. Double click on the output of Operator E and F to disabled them so we can more clearly hear the next two. Enable Operators C and D. I’ve panned these apart (just by 50 each this time) and set their amplitudes to 25 and 50.
This is where our sound begins to take shape. Let’s start with Operator C. I’ve set the Ratio to 3 – this means the note is 3 x the frequency of what’s played, which effectively equates to an octave + a perfect fifth above our root. FM synthesis often uses ratios instead of conventional coarse and fine tuning seen on analog synths before it.
The relationship between frequency and pitch is that if you double the frequency, the pitch increases by one octave, and if you half it, it drops an octave. Think of the ratio as a multiple, so 1 is your start note, 0.5 is one octave below that, 2 is one octave above, 4 is another octave, 8 is another octave. The ratios in between relate to the harmonic series (more on this another time). If 3 is an octave plus a perfect fifth, 6 would be one octave above that etc.
I’m going to select the 1+3 waveform, which is the first and third harmonic. This is where a practical example is useful. If we play the note A1 (A in the first octave) we would hear the note E2 if we just used a sine wave, that’s because E2 is the third harmonic of A1.
However since we’re using the 1+3 wave, we’re going to hear E2 and B3, as B3 is the third harmonic of E2. Don’t worry if you don’t follow this exactly, you can experiment with ratios and waveforms to see what you like, but there’s no harm in understanding the theory a bit better.
Moving on to Operator D, I’ve selected a Ratio of 0.5, so this is one octave below our starting note. I’ve selected the 1+4 wave, which is the first and fourth harmonic. Again using the MIDI note A1 as an example we would hear A0 and A2, as A2 is the fourth harmonic of A0.
I’ll leave those where they are for now and move on to A and B. Again, double click on the output stage to silence the Operators. Let’s select some richer waveforms for A and B. I’ve selected Ratios of 0.5 and 1 using the 4th Formant and 2nd Formant waveforms. Formant waveforms aren’t well explained in the FM8 manual, but in short they’re vocal-like sounding waves that resonate around certain harmonics (the 4th and 2nd respectively).
Pan these two Operators apart (15 either way will do) and give them an amplitude of 30 each.
Now let’s get the other Operators back in and see where we are:

All oscillators together sound like this.
Currently it’s nothing special, just six tones tuned differently. Let’s start modulating our Operators’ frequency. First we need to understand how the Matrix works.
FM Matrix
Like the output and panning sections at the bottom of the Matrix, frequency modulation
Modulate E and F by Operator A by an amount of 30 – doing this will brighten our pad, adding some harmonics to the upper mids. Now, here’s the clever part – adjust Operator A’s amplitude envelope attack to rise over half a bar (2/4). This means when the patch receives MIDI note on information, it will take two beats to reach an amplitude of 30, which in turn modulates the frequency of Operators E and F.
I’m going to do the same with Operator B, but this time I’m going to adjust the Slope control making out envelope exponential. This means over the same time the envelope’s attack will rise more steeply, contrasting with Operator A.
FM8’s envelopes are incredibly powerful, allowing a loopable pattern whilst the synth is sustaining. Adjust the Sustain stage to reach from 1/2 to 3/2 and ctrl + click anywhere inside the sustain stage to add a break point. I’ve added two and set them to create a fast fall and rise. If you’ve done it correctly it should look like this:

We can self-modulate Operators too; by click-dragging in the square just above an operator you can introduce extra harmonics. I’ve self-modulated operators E and F by 20 and A and B by 15.
Let’s add some more complex envelope to our already existing Operators. I’ve added similar (but not identical) looping sustain stages to A, C and F, also increasing the attack of E and F. Even though these looped sustain stages are synced with a meter, they’re not exactly layered with each other, creating a slightly cacophonous, waterfall effects where they’re tumbling over each other, like throwing several tennis balls down a stair case (if you follow the analogy).
Before exporting another audio instance of our patch, let’s add some more frequency modulation, with E and F modulation A, B, C and D all by a value of 10, C and D modulating each other by 10 and E and F, also by 10.
I’ve opted for a longer example now, to showcase the longer envelope stages:
Our FM matrix now looks some like this:

Z Operator
In addition to Operators A to F we have X, Z and and In. I wont be dealing with X or In today, but just quickly X is a distortion circuit and In allows external input into FM8, which I’ll focus on in another article.
Operator Z is an envelope controlled multimode filter. Let’s temporarily disable the outputs of Operators A to F (leave their pan position intact, that information is retained), and route then to Z. Of course Operator Z needs to be switched on (ctrl + click) and routed to the output.
I’ve set the cutoff to about 8’o’clock and both Resonance dials to 12’o’clock. This is really two filters in one, with the Spread (I’ve set to 2’o’clock) determining the gap between them, each with their own resonance control.
The Mode controls sweep between a low, band and high pass filter circuit. I’ve adjust the first to about 15 and left the second alone. We have other control I don’t need now like the Mix between the two filters and and Parallel/Series dial, but let’s leave it as is.
Next move to the envelope and create a shape that fits what you want to do. I’ve given it a long and decay. A good tip here is to leave the release longer than any of your amplitude envelopes, or you can run into odd problems. Add in some Envelope Modulation (about 3’o’clock) and let’s hear what we’ve got.

Once you’re happy with the results you can (in addition to) reroute your Operators back to the master and adjust the level of Z to taste.
Modulation Matrix
Our sound is starting to take shape, but lets add some more modulation to it. In the left Navigator menu we also have a tab called Mod, where we can set up pitch bend ranges, modulation wheel control, LFOs and more.
Whilst LFOs in FM8 are far less flexible than envelopes, they can add a nice pulsating touch if used subtly. I’ve set up LFO 1 to be a Sine wave with a rate of 20 and LFO 2 to be 4th Formant wave with a slower rate of 7. If you want to hear what theses are doing, increase their modulation in the Modulation Matrix to maximum on one Operator and it’ll be clear.
LFO 1 is modulation A and B by 15 and C and D by 100, while LFO 2 is modulation A and B by 100 and E and F by 60. I’ve also set the Mod (modulation wheel) to modulate each active Operator by a value of 20.
Here’s what the matrix looks and sounds like with some mod wheel action, it’s not a drastic change, but it’s subtle and that’s what we’re after.

The sound’s taking shape now, so let’s move on.
Finishing Touches: the Master Section and Effects
I’m going to start by further detuning each Operator slightly, this time not only with the Offset (Hz). In the Ops tab we can most easily view all our Operators tuning settings. I’m adjusting the Ratio and Offset by small values, never more than a decimal place or two. This widens the sound up nicely.
I’m also going to add some Vel (velocity modulation) to the Operators, this means with higher velocity values they will be louder, and with lower they’ll be quieter, which has a domino like effect on their frequency modulation.

Now head over the Easy/Morph tab – here we can make wholesale changes to basic aspects of the sound without having to repeat that action for each Operator. Increase the A and R (attack and release) for both Timbre and Amplitude Envelopes.
I’ve also increased slightly the Vibrato, Timbre and Tremolo on the LFO tab, increased the Brightness on the Timbre section and Stereo Width on the Output section. Sounding good. Now open the Master tab from the left Navigator panel.
I’m going to increase the Polyphony voices to 16 and increase the Unison Detune to 30 and the Unison Pan to maximum – leave the Unison Voices at 1. Lastly I’ve adjusted the Analog quality to 10 – this adds some pseudo random detune to the sound, similar to that of an analog synth.

In the Effects tab I’ve added some Tremolo (slow Rate, Stereo button enabled), Reverb (big), PsycheDelay (increased Pitch to 12 semitones) and Chorus/Delay (use the Lo Cut to preserve some stereo information in the bottom of the sound).

And we’re Done!
That’s the nuts and bolts of the sound, expressive, constantly moving envelopes, mild modulation with some stereo movement and you’re in the right room.
Here’s a short noodle with the patch running into four reverb send/returns, one with Valhalla Shimmer, one with the Eventide Blackhole, one with Native Instruments Reaktor 5 Space Master 2 and one with Logic’s Space Designer.

You can download the final patch (sans any of the posh reverbs added later) here.
About The Author
Related posts:
 Squarepusher: Tommib (Ableton Deconstruction)
 A Bluffers’ Guide to Frequency Modulation
 Celling Out: Reaktor’s Wavetable Synth Oki Computer
 Reaktor’s SpaceDrone
 Reaktor 102: Developing Our Synth
 Counterpoint in Native Instruments Massive
 Chord of the Day: Aphex Twin – Cliffs
 Processed: Audio Beautifier for Reaktor
 Aphex Twin: Tha (Ableton Recreation)
 Modular Electro Sample Pack


Nice work Ali – an easy to follow but complex enough to be useful article! Awesome examples.
Great info, thank you so much!
Thanks Ellen!